

Viofo A139 dash cam review
REVIEW -Back in September of last year I had a car back into the front of my car as we were waiting in line to leave a parking lot. I am guessing the car pulled too far forward, panicked, and threw their car in reverse without doing a thorough check behind them. It seemed to happen in slow motion, but I had not time to get out of the way. I was very fortunate that the driver of that car stepped up and took ownership of the accident. They could have easily claimed that I drove into them. If I had installed a dashcam to record the situation, I would not have been worried at all. So when the A139 dashcam from Viofo came up for review I jumped on it. Let’s see how it performs.
What is it?
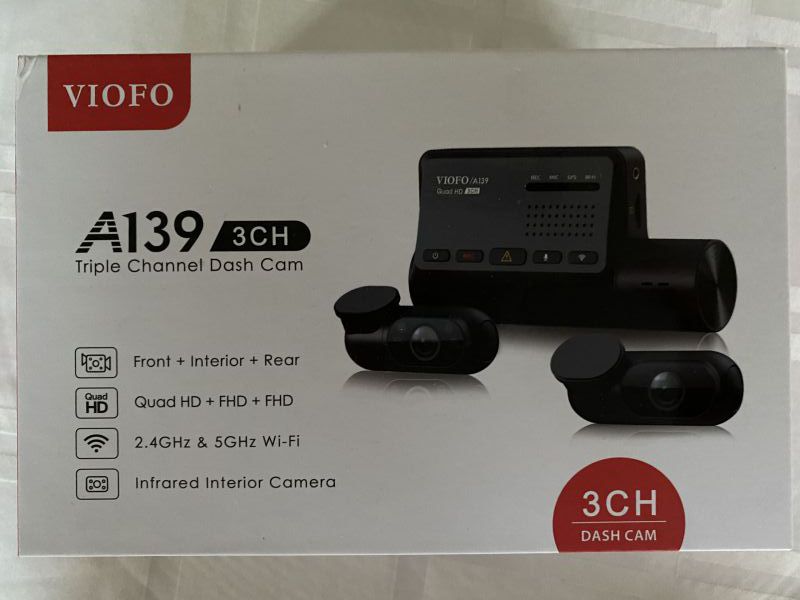
The Viofo A139 is a dashcam system that can come with one or two extra cameras. The two-camera package includes an additional rear camera, while the three-camera package also includes an interior camera.
What’s in the box?
The A139 comes packed nicely in the box above. The main camera was nicely packed in a foam insert with the rest of the cameras and accessories stored in plastic below. Everything was really snug in the box so jostling it around resulted in no items getting smacked together. I ended up taking three separate pictures because of the amount of stuff packed into the box.
- Main front viewing camera
- Back camera
- Interior camera
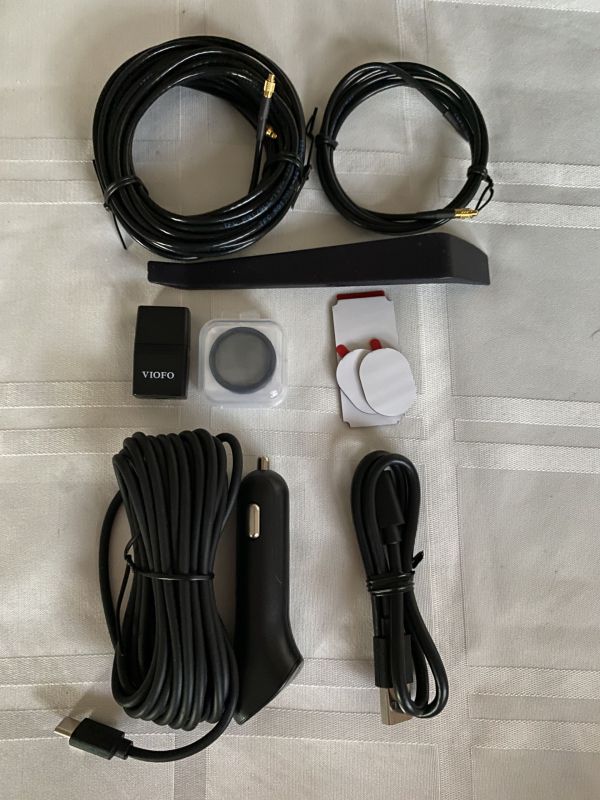
- Cable for the back camera to the front camera (6 meters)
- Cable for the interior camera to the front camera (1 meter)
- Trim removal tool
- USB micro SD card reader adapter
- Circular polarizer
- Extra mounting stickers
- Power cord for the main camera to cigarette lighter plug
- USB-C type cable
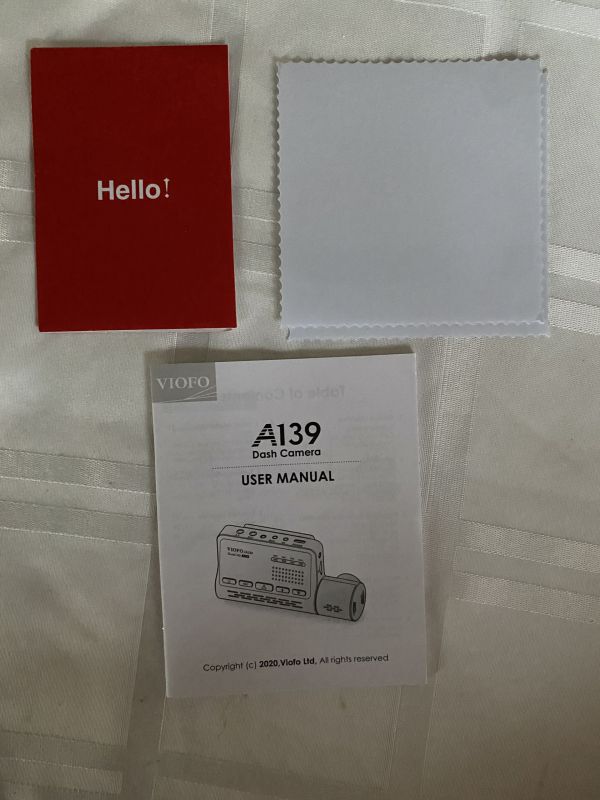
- Welcome card with registration and warranty info – Warranty for 1 year with lifetime tech support through their website
- Two static windshield stickers
- User Manual
Hardware specs
- 3 Channel 2K 1440P Front + 1080P Interior + 1080P Rear Dash Cam
- Sony Starvis Image Sensor
- F1.6 Aperture 7 Elements Glass Lens
- 140°+ 170°+ 170° Wide Viewing Angle
- Voice Notification
- Dual-Band Wi-Fi Built-in 2.4GHz & 5GHz
- G-Sensor & Motion Detection Supported
- Parking Mode Supported
- Quick Release Mount
- GPS Logger (Included)
- CPL Filter (Included)
- Support External Microphone (Optional, Not Included)
- Bluetooth Emergency Remote (Optional, Not Included)
- Support Micro SD Card Class 10 up to 256GB
Design and features
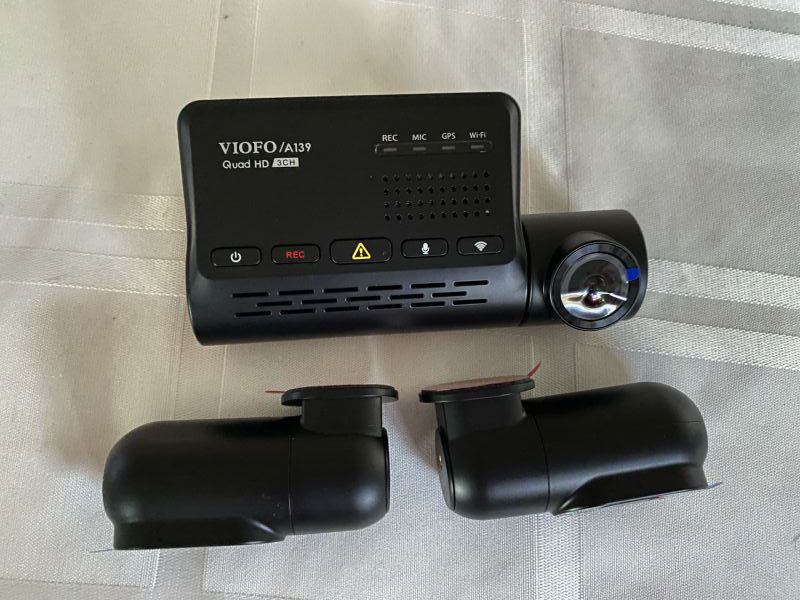
The A139 camera is packed with a ton of features. I took pictures of the cameras so I could discuss them in detail.

The main camera pictured above has quite a few buttons and display LEDs. The GPS LED will light up solid when a GPS connection is made by the camera. You can turn it off with the app, but no button on the camera will turn it off. The buttons from left to right are:
- Power button – The unit powers on automatically when the socket that it is plugged into receives power. This button will let you turn the unit off and on manually if you wish.
- Record button – The unit will start recording automatically after powering on. If you want to stop recording manually you would press this button. When recording the REC LED above lights up.
- Video Protect button – pressing this button will lock the video that was currently recording to keep you from deleting it.
- Microphone button – pressing this button turns the microphone on or off. When it is on, the MIC LED will light up. The audio recording is recorded onto all three cameras.
- WiFi button – a long three-second press will activate the WiFi for the camera so that you may connect to it on the phone. When WiFi is on the WiFi LED will blink. It will turn a steady color when your phone has connected.
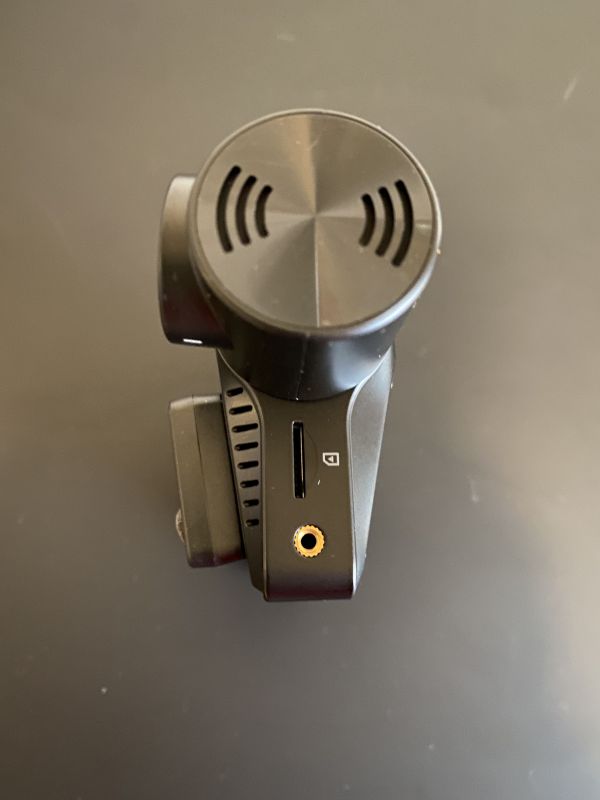
The side of the camera with the lens has a screw hole for a camera mount and the micro-SD card slot.

The top of the camera contains the following items from left to right.
- AV out port
- Microphone out port – they do sell an optional microphone. I did find that the audio recording worked really well as is.
- Another screw hole for a mounting point.
- Rear camera port
- Internal camera port
- USB-C power port
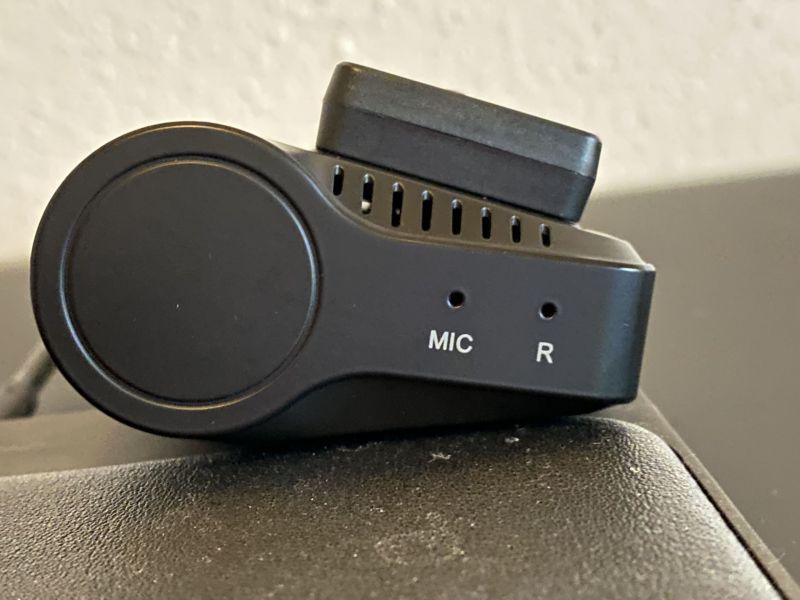
The other side of the main camera has a hole for the microphone and a hole for a reset button.
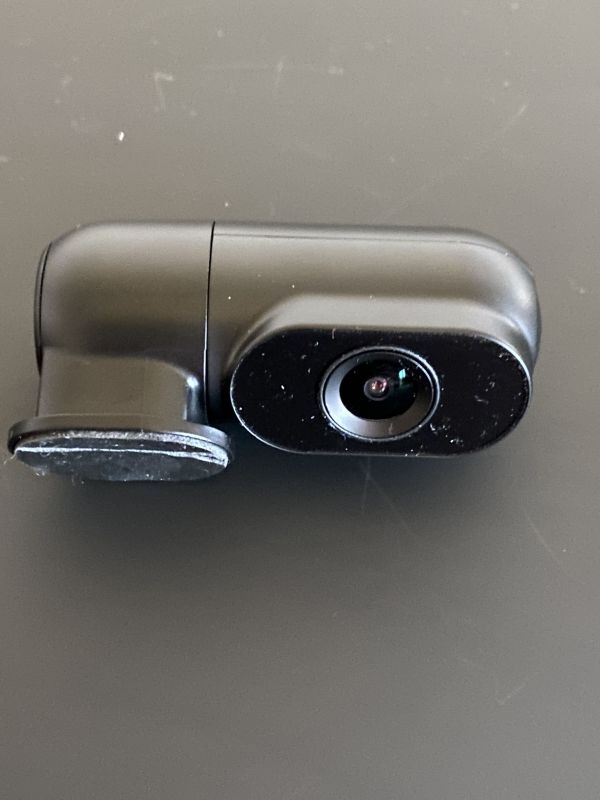
This is a picture of the rear camera. The mounting base can swivel a full 360 degrees.
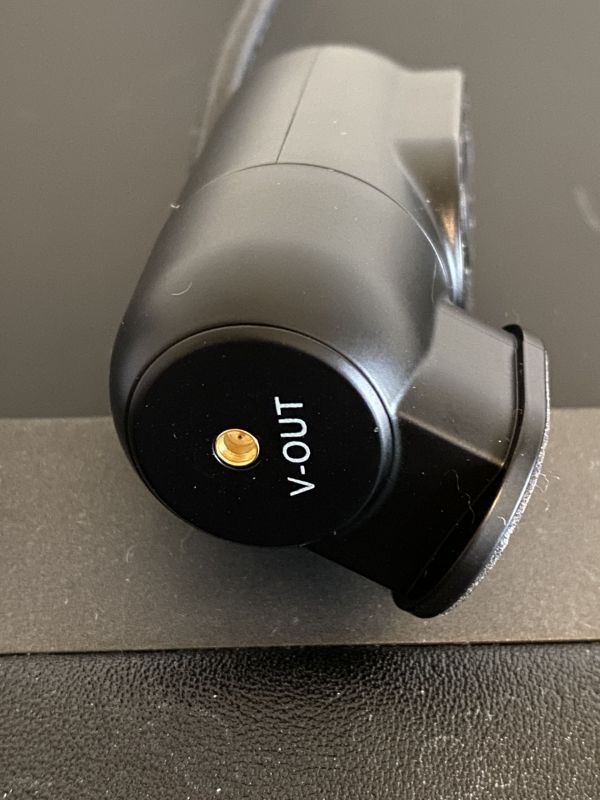
This is a picture of the side of the rear camera, but note that the interior camera looks exactly the same. It has the port for the video-out cable.
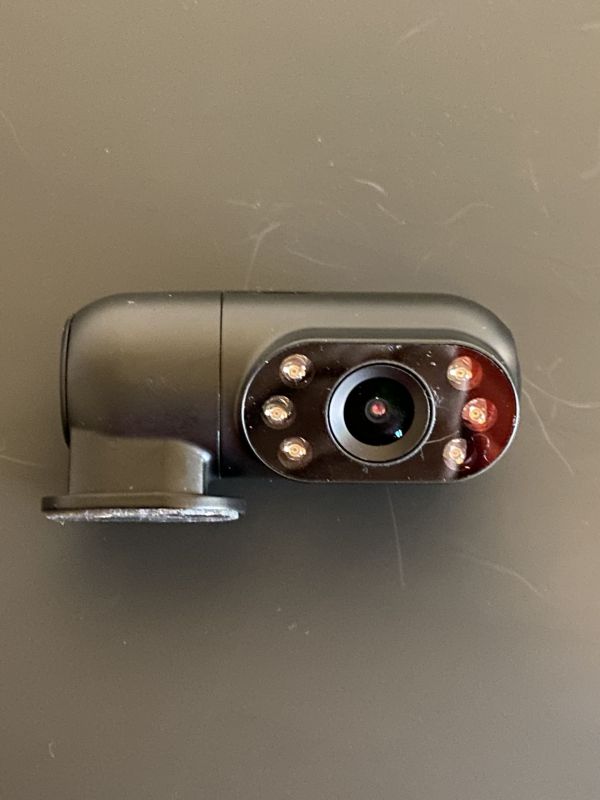
Finally, we have a picture of the interior camera. It is just like the exterior camera except that it has infrared LEDs.
Setup
To change the settings on the camera and preview the videos without taking out the memory card, you need to install the VIOFO Photo and Video app. The following pictures show you the app and what it provides for the camera.
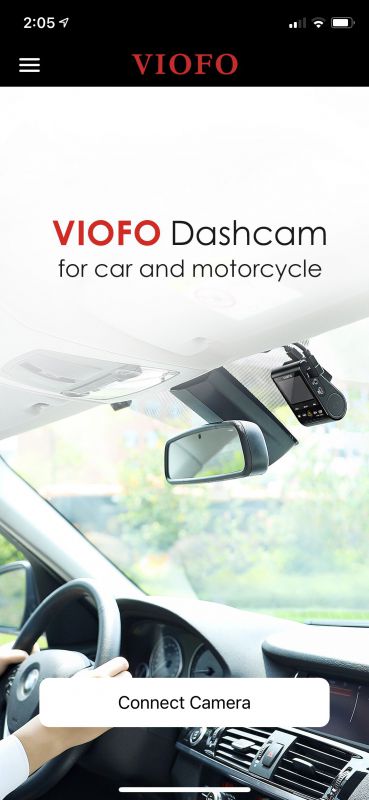
The first thing you see when you open the app is the connect camera button. At this point, you need to go to your phone WiFi settings and connect to the camera Wifi. The camera offers both 2.4Ghz and 5Ghz. It defaults to 2.4Ghz. Once you are connected to Wifi on the camera, you can go back into the app and press the Connect Camera button.

You are then presented with the main camera screen. When I took this screenshot, I only had the main camera connected. You will notice there is a switch camera option. This lets you switch the view from the main front camera, to the back camera, and then the interior camera. A fourth press of the button and you can have all three cameras displayed on the same screen. I don’t find that very usable as the display tends to get small at that point. This screen also lets you take a snapshot from any of the cameras. At the bottom of the screen from left to right, there is a video list option, a record button, and a settings button. You cannot go into settings while you are recording. You must press the record button to turn off the recording and then you can go into settings. I want to note that by default there is an annoying audio beep that repeats about every second when you have the recording turned off. This can be turned off later in settings.
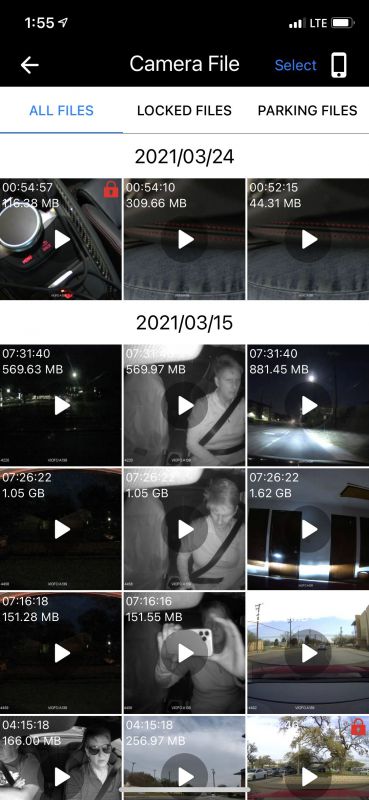
This is the video file list. It has everything by date. It also has options to see only locked or parking files.

Touching a video file will bring you to the video playback screen. From there you can watch the video and download it to your phone if you wish.
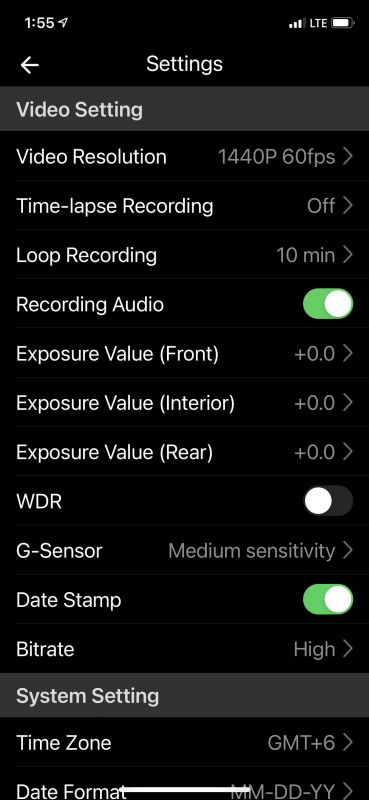
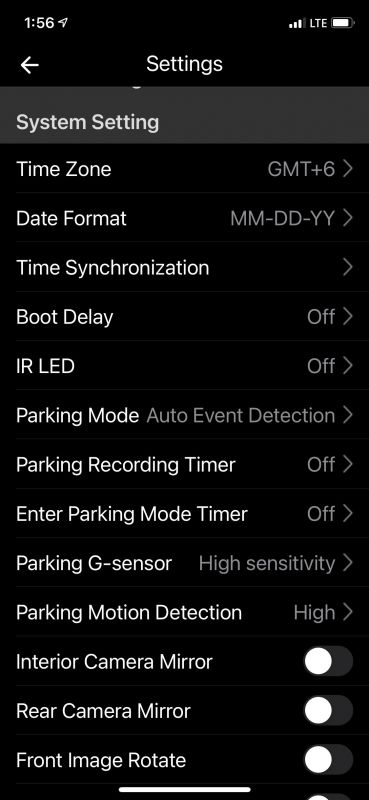
These next few screenshots show the plethora of settings available on the cameras. Most are self-explanatory. I will mention all of the parking settings are only applicable if you have the hardwired power adapter on the camera. For me I was using the cigarette lighter, so when the car shut off, so did the camera.
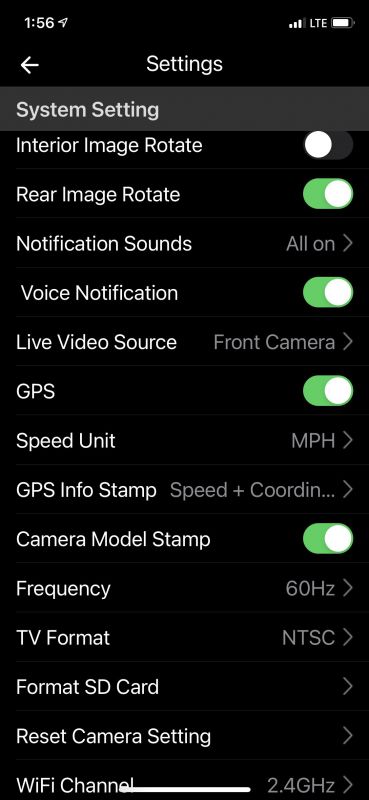

These are the last two pages of the settings. The next few screenshots will show you some of the options of the settings.
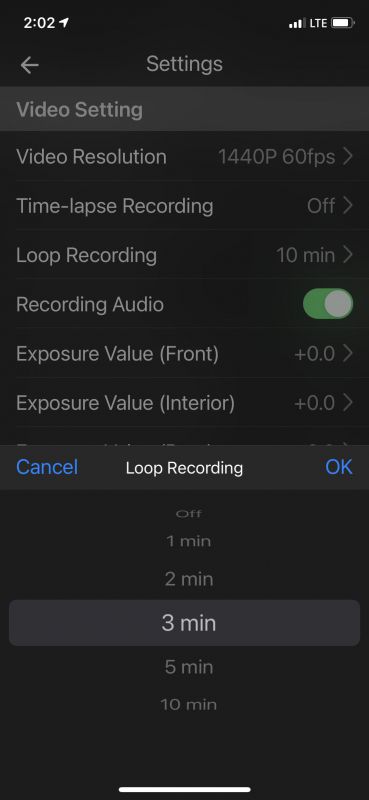
The camera offers loop recording wher the oldest video will get overwritten by new video if it is not a locked video. You can have recordings from 1 minute to 10 minutes long.

These are the settings for the sensitivity of the gyroscope. I had mine set at medium. Fortunately for me, I never hit anything hard enough to force a lock file.

These are the bitrate choices.

These are the sound notification choices. I quickly changed my to startup sound only. If you leave all on, the camera will beep every second when you turn the video recording off. That becoming annoying quickly.

These are the frequency settings. I set mine at the higher 60 Hz. I have a 128 Gb SSD in the camera and I was not too worried about space.
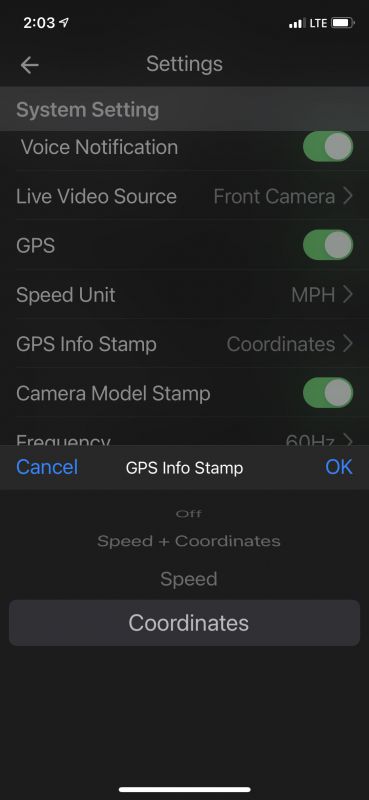
The camera will put both your speed and GPS coordinates on the bottom left of the recordings. When I made my recordings it was on GPS and Speed by default. I have changed it to coordinates only. No need to record my speed, please!
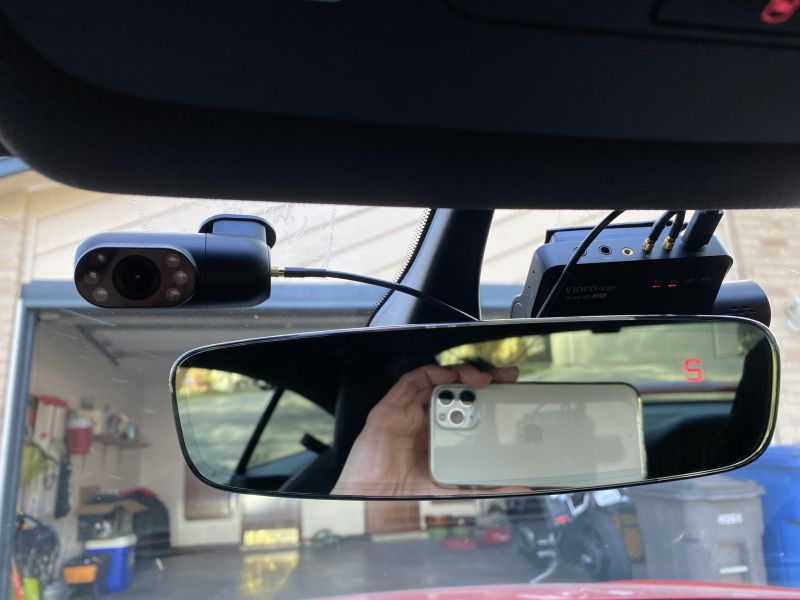
Here is a picture of the interior camera on my left and main camera on my right. You can see the LED lights on the interior camera. I had them on auto and they never came on for me that I could tell. Even in my nighttime drive, I could never tell that they came on. I do want you to note how slim and small the cables are that are running from the two smaller cameras to the main camera. That makes it much easier to run cable for the install. You may also notice that the cameras were installed using the static cling material. This is awesome if you place it correctly the first time. However, if you need to pull and redo the placement – Forget about it! I really wish these cameras had come with a different mode of installation. Suction cups like in other cameras I have used before would have been awesome. I will have to look into other mounts that can use the camera screw holes going forward.

Here is the rear camera. I mounted it to the top of my hatchback window. Let me state that my car, a Audi TT RS is not the best car to try to install these cameras. My car is also a lease, so removing moldings was not an option for me at this time. The TT RS is a sports car. That means it is designed with speed in mind and user niceties like having a cigarette lighter in a nice place are not an option. The only lighter was in my center console. So I had the main camera wire running through the glove box and along the passenger seat to the center console. Not very attractive. I will definitely have to see about getting the hardwired option in the future.
Performance
Now here is the part you have been waiting for, the videos of the cameras! I want to note that the audio is available on all three cameras. I chose not to include the audio on any video but the interior video. I turned the audio down on the recording. It was very loud and picked up everything. I also want to note that my interior video is in black and white while I think it should be in color. I have opened a support ticket with Viofo and I am waiting on a reply.
Here is the front camera video that was taken in the daytime. This was at 60Hz, high bitrate, and WDR off.
Now we get to the nighttime videos. Here are all three from the front, rear, and interior.
What I like
- It has the option for up to three cameras. front, rear, and interior
- It has small cables connecting interior and rear cameras to the main camera
- Lots of setting options. Will record GPS and speed if you wish.
- Great picture quality with high bitrates and an HDR option.
- It has voice prompts that tell you that it is recording three, two, or one channel along with prompts for microphone and WiFi off or on.
What needs to be improved
- Need to find out why the interior camera is always black and white.
- Need better mounting options. They could at least sell something that uses the camera mounting rings.
Final thoughts
This is a really nice dash camera system. It will give you complete coverage of your car if you get all three cameras. They offer options for hardwired power, Bluetooth remotes, and external microphones. The sound quality is excellent and picks up everything. I am hoping for some kind of user error on why the interior camera is only black and white, and I really wish they had better mounting options. If you are looking for a high-quality two or three-camera setup, then this may be the package for you.
Price: $269.99
Where to buy: Viofo and Amazon
Source: The sample of this product was provided by Viofo.
Filed in categories: Reviews
Viofo A139 dash cam review originally appeared on The Gadgeteer on April 7, 2021 at 10:00 am.
Note: If you are subscribed to this feed through FeedBurner, please switch to our native feed URL http://the-gadgeteer.com/feed/ in order to ensure continuous delivery.