

PortraitPro Studio Max 21 photo editing software review – Be your own supermodel
REVIEW – I’m convinced that every struggling actor who isn’t waiting tables in Los Angeles is a headshot photographer, and yet, like a five-year-old, trying to pull it together for a real headshot is way too much work for me. At the same time, I also feel like you are your own best PR person, so you should still have a decent photo ready in case you need it. When I saw that the PortraitPro Studio Max 21 was “The world’s easiest portrait enhancement software,” I thought “Well, we’ll see about that!”
What is it?
It’s an easy-to-use suite of software that can improve your portraits or selfies in a variety of ways.
What’s in the box?
No box, just a software download!
System Requirements:
Processor
2GHz processor or faster recommended.
Memory
2GB RAM minimum recommended. To handle larger images (8 megapixel or more) you would benefit from having 4GB or more RAM.
Display
1024 x 600 minimum supported display size.
OS
Windows – 64-bit Windows 10, Windows 8, or Windows 7, with the latest updates installed.
Mac – 64-bit macOS 10.12 or later.
Design and Features
First an admission: I’m by no means a pro with photo editing software. I somehow managed to get a master’s degree in journalism without ever really learning Photoshop, which I think makes me uniquely qualified to review this software. I mean, they make a big deal about how easy it is to learn and I’m basically starting from zero. What I found is that it really is pretty simple — they do make it easy to learn. The results are pretty cool too!
The software downloads and installs like any other software. When you first open the program, a series of videos and prescribed tutorials lead you through retouching some built in photos. There’s a lot to learn, and I didn’t go through every tutorial, but I worked through enough to get the basics down and you can repeat the tutorials completely or in part as many times as you want. I had to go back and figure out how to replace the sky in a photo because I couldn’t remember the steps, and I was able to find that tutorial and skip to the part I needed very easily.
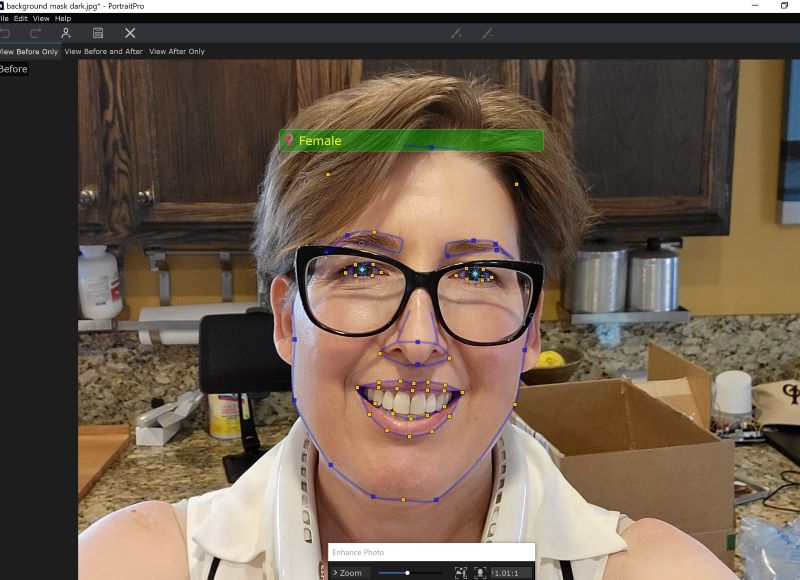
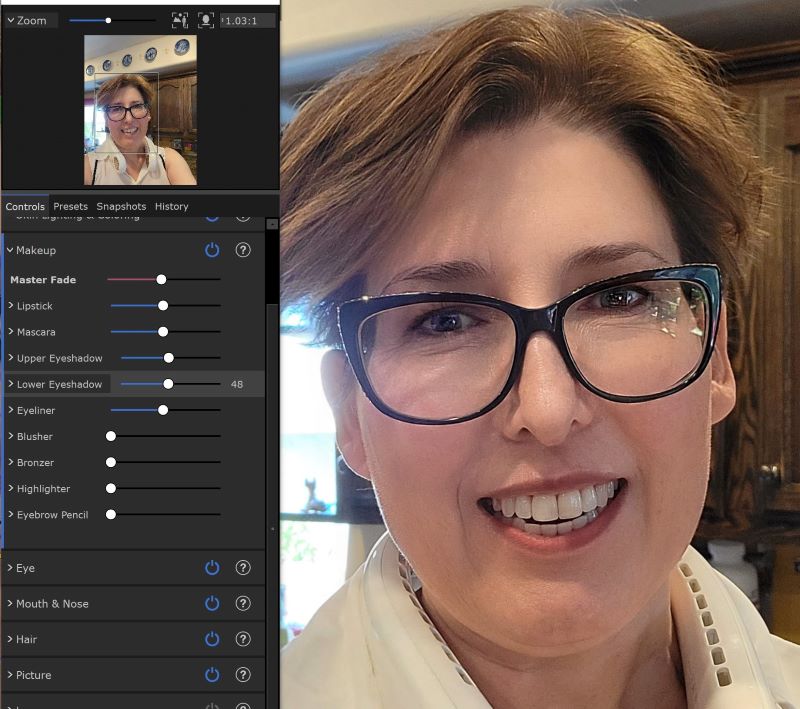
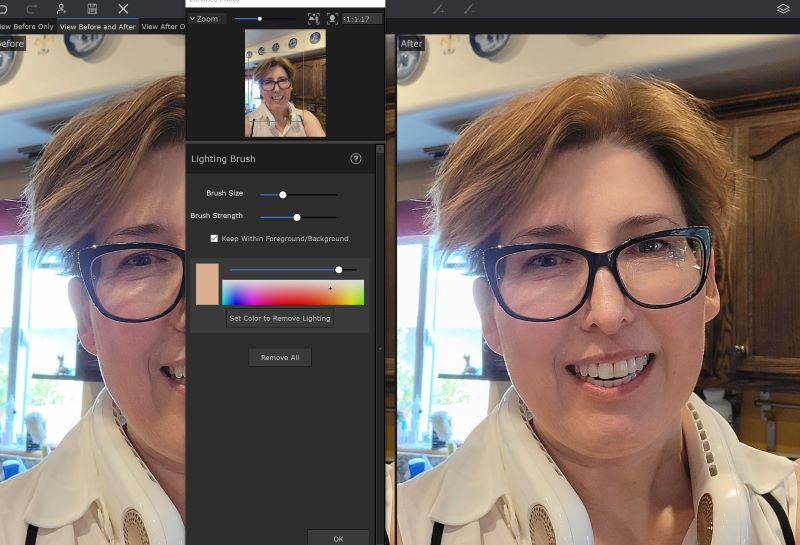
The first thing you do (or at least I did) when I first started working on my photo was to drag the face points to where they needed to be. The software outlines your features but it didn’t seem to be able to read the shape of my face or the arch of my eyebrows very well. I wanted to fix that since that’s how the software figures out what it’s enhancing. For example, I can darken my eyebrows with the software, but if it doesn’t know where my eyebrows start and end, it might not do the best job. To do that you just drag and drop the little purple boxes where they should be.
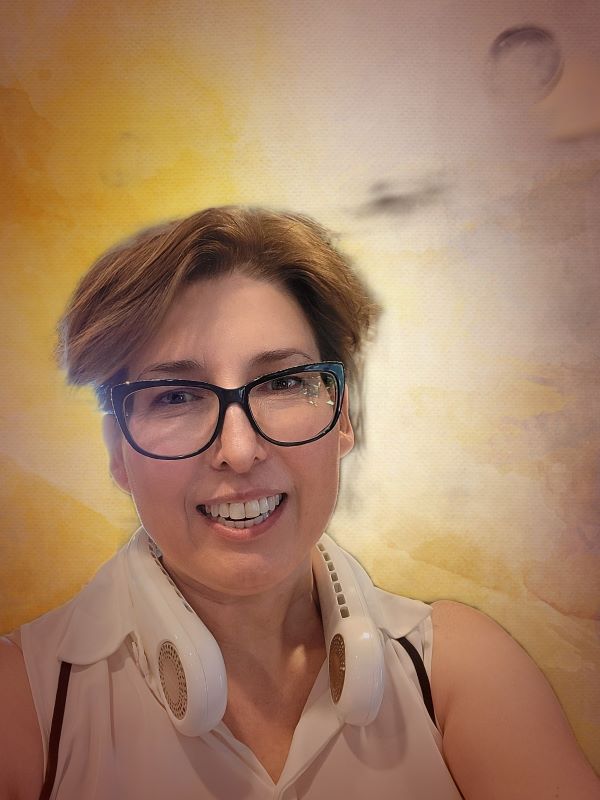
The software has the ability to apply makeup, change the shape of your face, sculpt your features, and basically “fix” anything that you find unflattering. It can also change the background, substituting a series of more dramatic ones, like different kinds of skies and patterns.
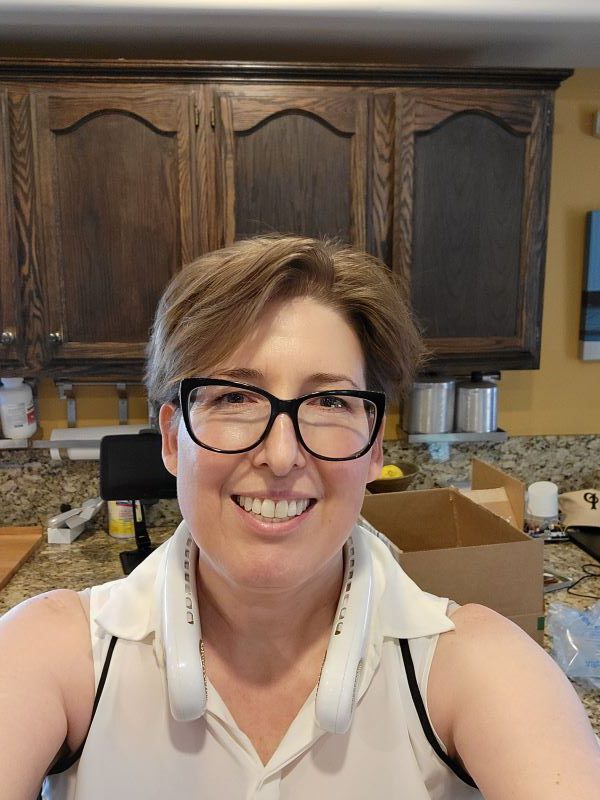
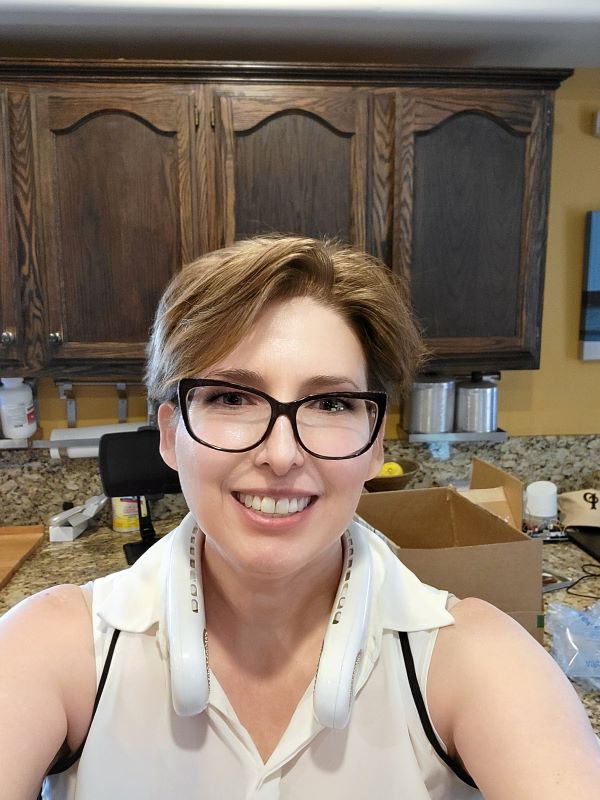
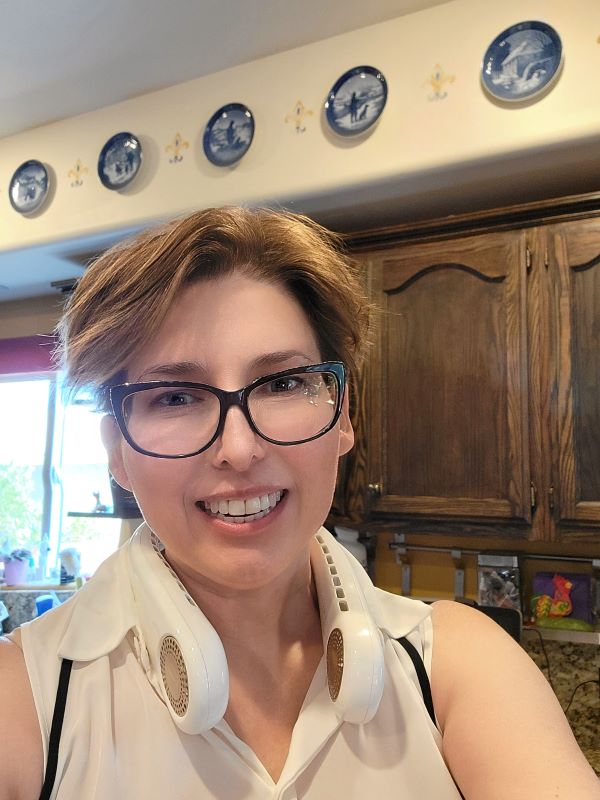
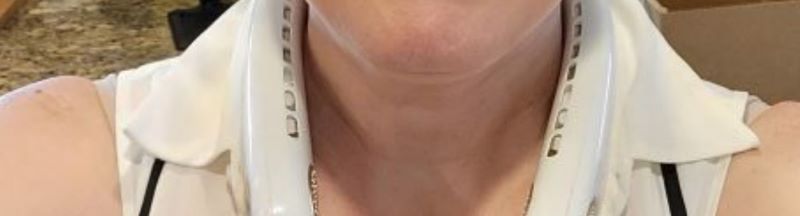
In these pictures, I am using a couple of selfies that I took for my review of a wearable air conditioner that I’m also working on. I think I look OK in them, but there’s almost always room for improvement in any photo. Here are the unretouched photos I worked with:

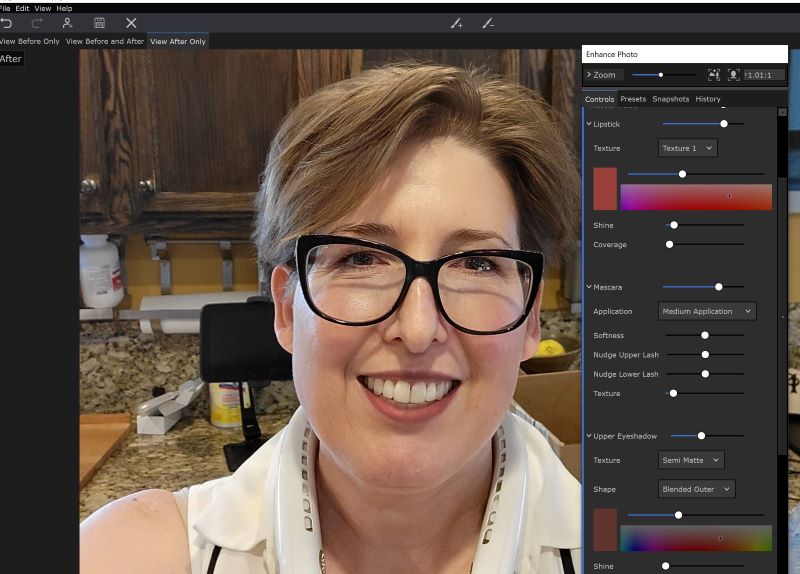
The thing that makes this software easy to use is that it has a bunch of sliders that you can use to manipulate just about every part of the picture. It also has some presets that you can use to give you a head start on retouching your photos. Below is an example of an original picture and the “Standard” retouching that the program did automatically.

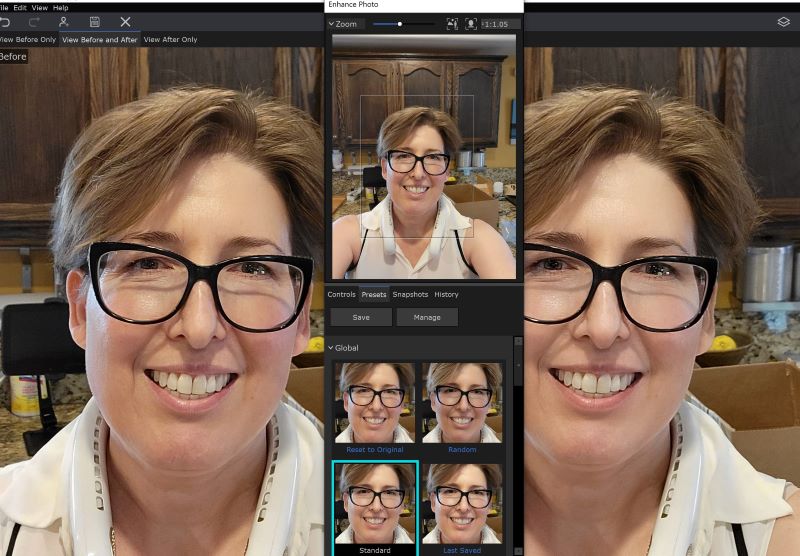
You can see that in the original photo on the left I have a few more eye wrinkles and a bit more shine. My face has some harsher shadows and my skin is not quite as uniform in the photo on the left. Also my hair seems to have a bit more contrast. I think I still look like me, and I think I look good in both photos, but the one on the right is just a bit better.
Some of the other presets are not so flattering. In the photo below, the preset called “Glamorous” makes me look pretty weird. Yeah, I’m wrinkle-less, but I also have an oddly proportioned face. It’s like half of the bottom of my face has been made pointy or something. I think I look like an alien.
I think we can all agree those aren’t very glamorous, despite the filter’s name. But you might notice that the program has put on a bit of makeup in those photos, and that can be tweaked with the sliders too. I never was able to get lipstick to look right — I think that takes a pretty light touch in this program and I think the shadows in my photos may have had something to do with it. I think the eye make up looks pretty good in the pics below:
You can even highlight your hair with a light brush that you just click and drag across the area you wish to highlight (you can adjust the color just as you can with the lipstick).

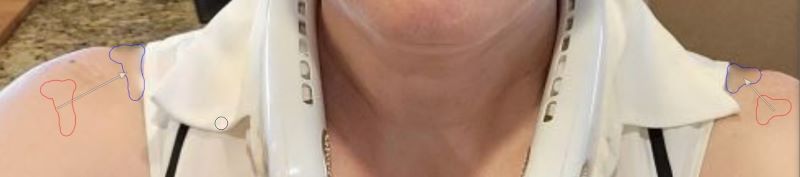
You might have noticed that I have a little bra strap showing in all of these pictures. Let’s fix that before my mother sees this article and I get a phone call. The clone tool lets you mask whatever offending thing you want and then substitute something that is colored similarly. You can adjust the source for the masking, although the program will choose a source for you. On the right side, it chose to substitute the cardboard box and I had to drag the red blob down onto my shoulder. I am not a perfectionist, otherwise I would have played with this tool a bit more because the outcome is fine, but not ideal. I find the mask is kind of blurry and could be a bit more opaque, and I’m not sure how to fix that. Maybe there is a way but I haven’t played with this tool enough to know.
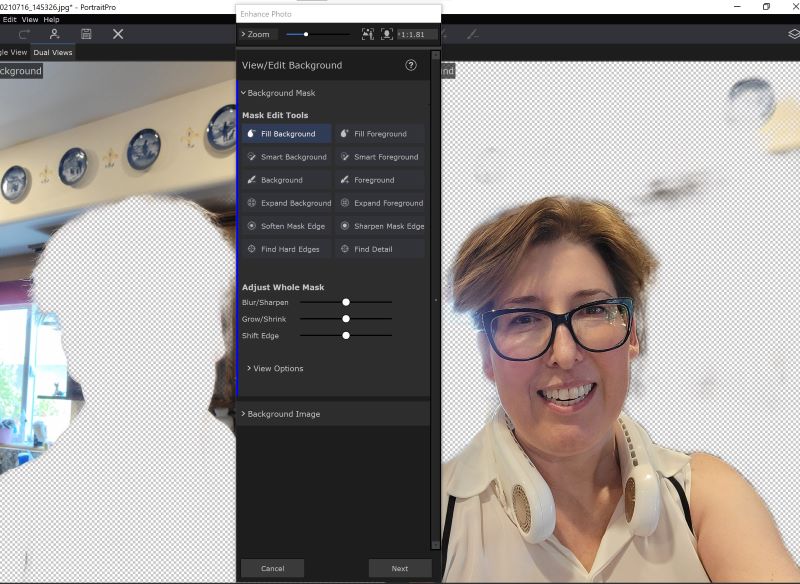
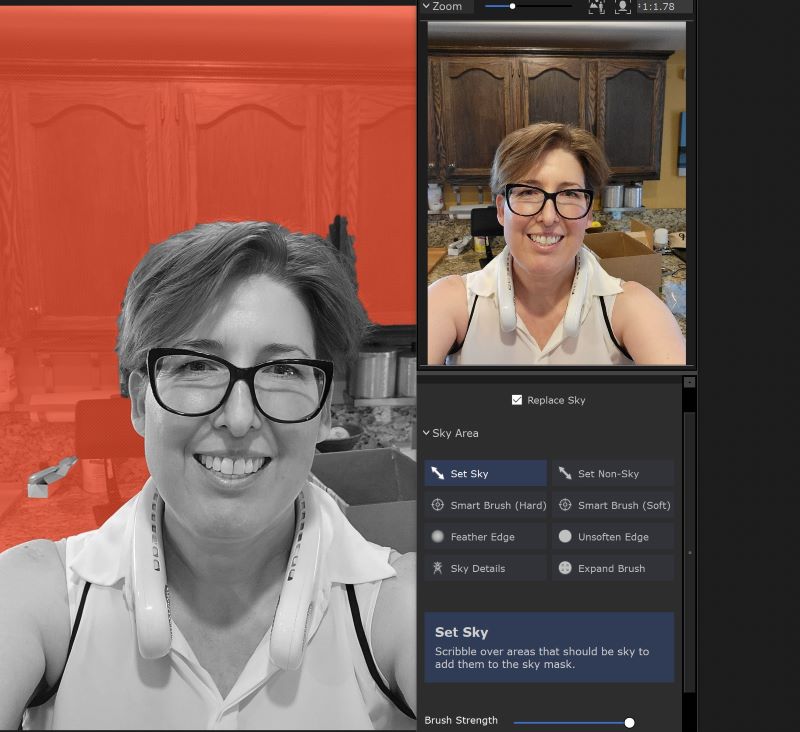
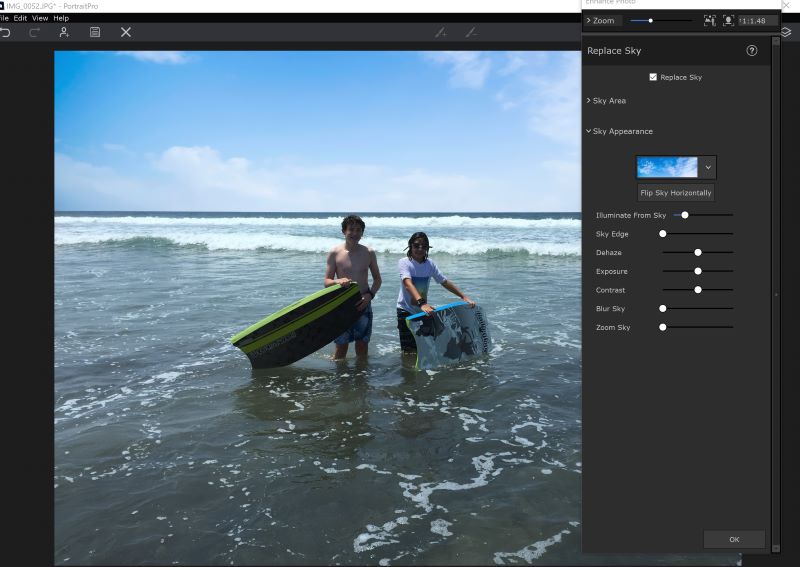
I’ve never been known for my housekeeping skills, but that doesn’t mean I want the entire internet to see my clutter. The program can insert new backgrounds or blur the backgrounds. Before you do that, you have to check and see what the program thinks is sky or background and adjust that if necessary. It’s pretty easy, you just select the “set sky” or “set background” tool and click and drag over parts that you want to be background or sky. You can zoom in if it’s a delicate area and you can choose to feather the edges as much as you want.
Here are a few of the backgrounds you can choose from:


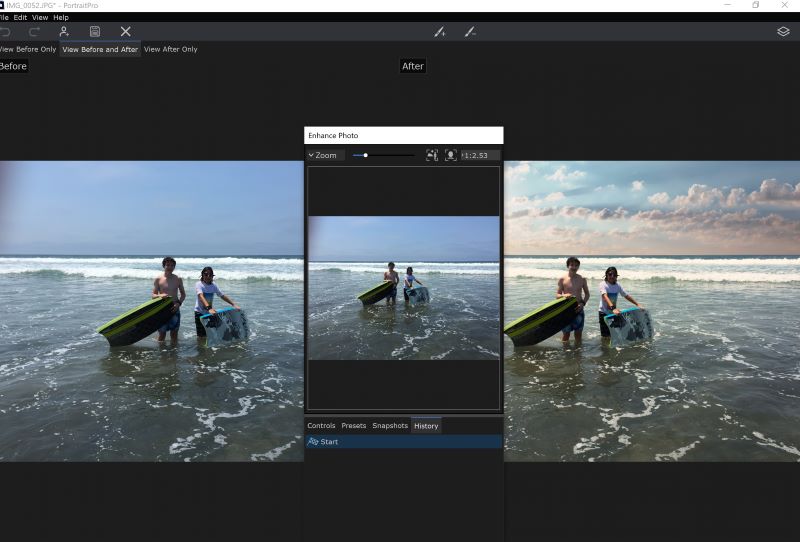
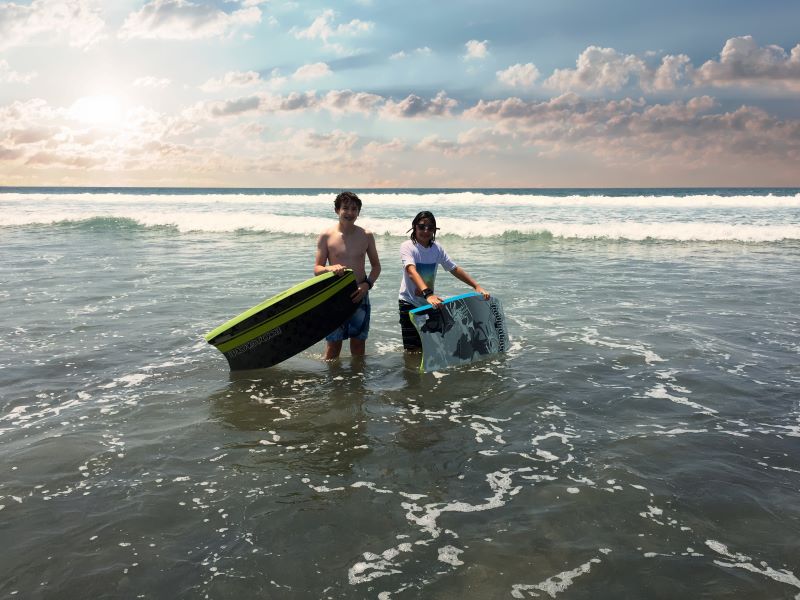
Just to give you an idea of some of the sky choices, I took this very mediocre picture of my son and his friend at the beach. I chose it based on the fact that it has a pretty plain sky in it as you can see on the left, but a dramatic sky makes it better overall (it seemed to correct the exposure problems too, particularly in the middle one).
What I like
- So simple to use and learn
- Many different things can be tweaked or corrected
What I’d change
- They could use some work on the glamorous preset.
Final thoughts
I really like this software and I’m sure I will use it for lots of things, especially when I have to be my own supermodel for the Gadgeteer. It is really easy to use and I think even if you just use the preset “standard” and stopped with that, you’d be please with the results.
Price: $169.95
Where to buy: On the Anthropics website
Source: The sample for this review was provided by Anthropics.
Filed in categories: Reviews
Tagged: Photo editing software, Photography
PortraitPro Studio Max 21 photo editing software review – Be your own supermodel originally appeared on The Gadgeteer on July 30, 2021 at 9:00 am.
Note: If you are subscribed to this feed through FeedBurner, please switch to our native feed URL http://the-gadgeteer.com/feed/ in order to ensure continuous delivery.